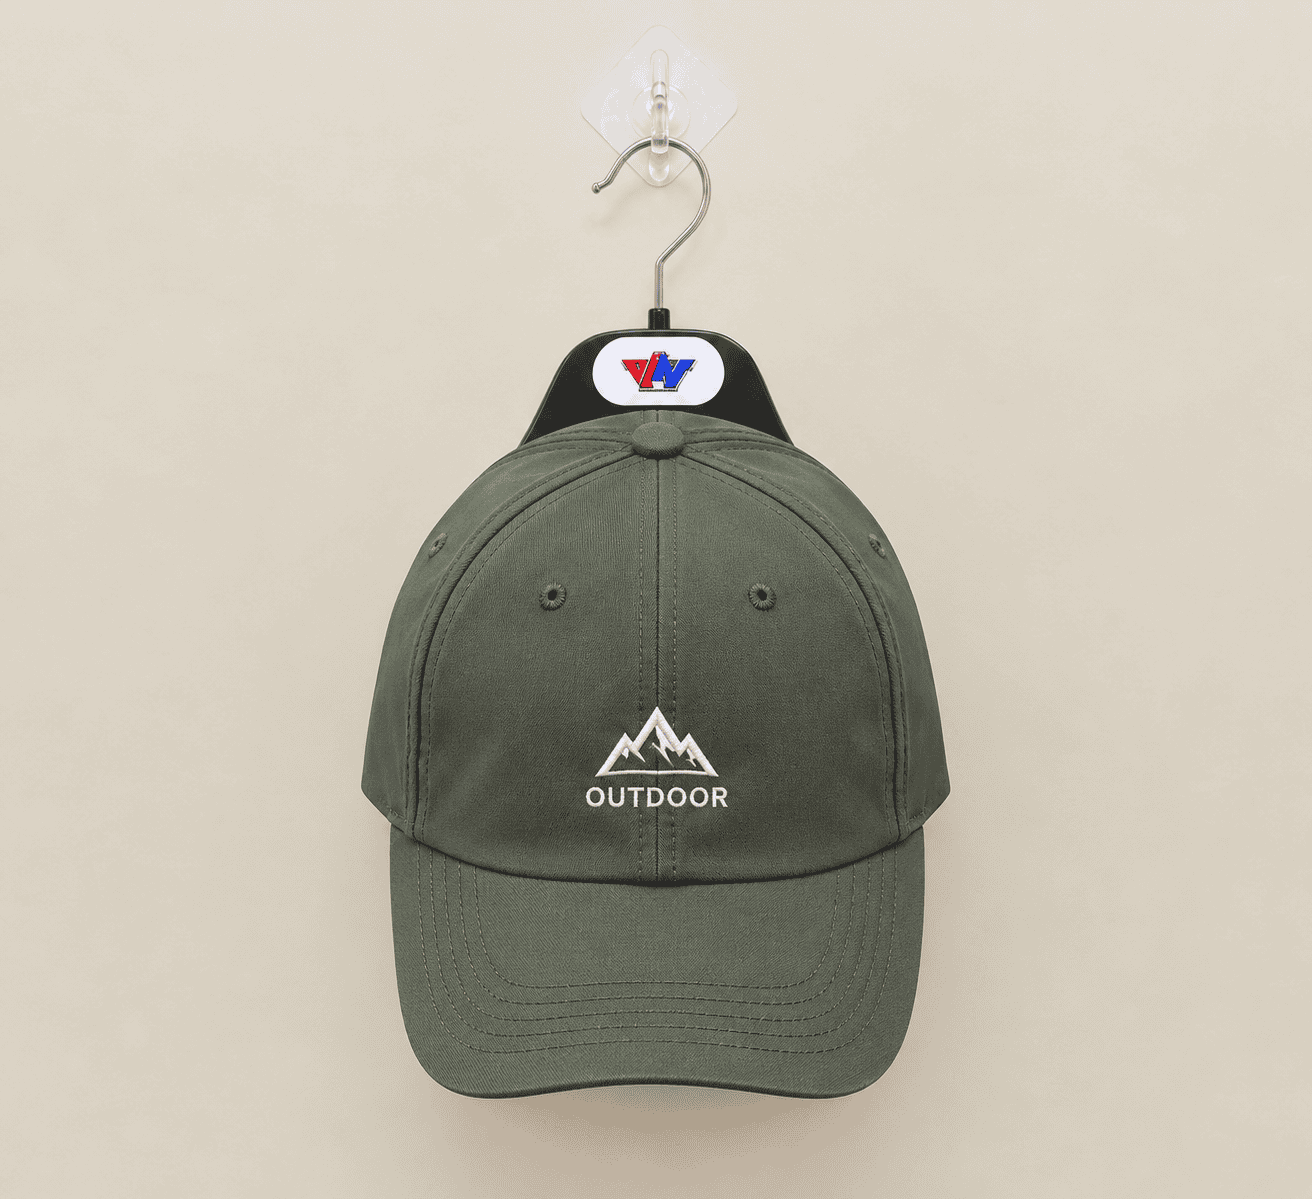
Custom hats are easier to source in bulk when the buyer can specify how the cap should fit, where the logo should sit and what the supplier needs to match on repeat orders. This guide focuses on branded caps for clothing lines, merchandise and uniforms. It takes you from the first brief through fit and material selection, sample approval, packing and the next order.
Define what the cap needs to do
Custom hats for a bulk order begin with a decision about how they will be worn. A café might want a washable cap for daily service. A brand selling limited collections might value a particular crown silhouette and a decoration style customers recognize from a distance. An event organizer might need several teams to receive the right colors on the same day. Write the purpose at the top of the brief so the sample maker can tell which compromises are acceptable and which ones would undermine the order.
Describe the wearer and the conditions the cap will see. Include expected wear duration, where the cap will be worn, whether a uniform already exists and how often the product will be cleaned. For merchandise, identify the sales channel and whether customers will be able to try on the cap. For uniforms, check what staff wear with it and who issues replacements. Ask buyers from each location to report any practical requirements before making the sample.
Separate fixed requirements from decisions the supplier can propose. Brand color and the approved logo file might be fixed, while a buyer could be open to several closure types. Identify the intended price range, the date the product must be available and the working quantity by style. If a requirement is awaiting approval, record its owner and decision date so suppliers know which quote assumptions may change.
Start the sourcing discussion with the M&A Sourcing Cap product category. Send the written brief alongside reference pictures. Mark the part of each picture you want to use. One may show a suitable crown shape and another may show the desired stitch color. A supplier can interpret those references more accurately when the buyer explains which features are relevant and lists the differences they expect.
Compare cap profiles and panel layouts
Crown height changes how a cap looks and where the front artwork sits. A low-profile sample may sit closer to the head and give a softer outline, while a higher crown may offer more front space. Profile labels vary across suppliers. Measure the approved reference and define the measuring points, then compare the results on several wearers. Evaluate the side view as well as the front because two caps with similar front height can have different depth and volume.
Try structured and unstructured designs in the intended material. A structured front typically holds its shape with internal support. An unstructured front follows the wearer and may fold more readily when packed. Place an example of the planned decoration on each sample. A design that looks flat when held in the hand can wrinkle, lift or become harder to read once the cap is worn.
Panel layout affects the front artwork. A six-panel cap often has a seam down the front center. Some five-panel styles provide a continuous front panel, though layouts vary. If a design spans the center seam, ask the supplier how the decoration will cross it and check the result on a finished sample. If the design sits to one side, measure from a panel edge or other repeatable reference that remains consistent between sizes.
Choose the visor with the crown. Visor shape, length and curve change the cap’s appearance and how it frames the face. Review flat and curved options from the side, then agree how the selected curve will be packed so the cap reaches the receiver in the intended shape. Ask whether a strong curve is formed before packing or is expected to be adjusted by the user. Record that expectation in the approval notes so everyone judges the delivered sample against the same reference.
| Feature | Options to compare | Sample evidence |
|---|---|---|
| Crown | Structured or unstructured, lower or higher profile | Front and side images on wearers across the fit range |
| Panel layout | Five-panel or six-panel construction | Front seam position and actual artwork placement |
| Closure | Snap, buckle, hook-and-loop, elastic or fitted | Usable circumference range and a movement trial |
| Visor | Flat or curved, with agreed length and shape | Side profile and a test carton when shape is sensitive |
| Sweatband | Compare proposed material, width and seam placement | Comfort feedback after ordinary wear and care |

Specify fit, closure and adjustment range
Measure the actual fit range instead of relying on a one-size label. Decide how the circumference is measured and whether the band is relaxed, at the shortest setting or at the longest usable setting. Ask the supplier to explain how much closure engagement is needed for a secure fit. A cap can technically close at a setting that leaves too little overlap to be comfortable during normal wear.
Trial the cap on people at different points in the intended range. Have them adjust it without help, turn their heads and bend forward. Record whether the band slips, pinches or presses into the forehead. Check whether crown depth causes the cap to sit too high or touch the ears. If a wearer reports discomfort, ask where and when it starts. A strap issue and a crown issue can feel similar in a quick fitting but require different corrections.
Compare closure types with the wearers who will actually use them. A snap closure gives defined settings. A strap and buckle can offer finer adjustment but the end of the strap needs somewhere to sit. A hook-and-loop closure may be quick to adjust, while an elastic or fitted style depends more heavily on the measurement and size range. Check how closures feel against the back of the head and how they behave with hair, uniforms or other garments normally worn at the same time.
For online merchandise, write the size guidance from the approved range. If a fitted style comes in several sizes, list the measured range of each and review how customers will choose between them. For uniforms, keep a few approved alternatives available for wearers outside the main range if the program requires it. Include size and closure codes in the order schedule and on the packing instructions.
Select fabric, lining and sweatband together
Ask for labeled fabric swatches before the first full sample. Identify the composition, weave or knit, finish and color. Compare the surface and weight in the hand, then judge the same material on a finished cap. Two fabrics can look similar when flat but differ in how they fold around seams, hold the crown shape and respond to decoration. A good fabric decision accounts for the profile and the wearer’s experience.
Review the sweatband as a separate component. It sits against the skin and can change how the cap feels even when the outside fabric stays the same. Check the width, seam placement and contact points around the forehead. Ask wearers to try it long enough to notice rubbing or pressure. If the cap is for daily uniforms, agree how staff will clean it and use that process to evaluate the complete sample.
Inspect seam binding, lining, ventilation openings and the back panels. On a mesh-backed style, check the feel of the mesh at the edge and the transition to the front material. On a fully fabric cap, review the position and finish of eyelets if the design includes them. Check whether the inside tape or trim changes the flexibility of the cap across the head. A construction can look neat from the outside yet feel bulky where multiple panels meet.
Approve components together in the expected viewing conditions. The shell, mesh, visor underside, top button, thread and closure can all come from different materials. If they should match, compare them as a set. If contrast is intended, record the accepted combination by color and component. Keep a physical set of approved references when practical. A supplier discussing a substitution can then compare the proposed material to the one the buyer actually approved.
Choose decoration that suits the artwork
Send the supplier the approved artwork file and the smallest size at which the logo must remain readable. Include the colors, intended placement and the file revision. For each position, state what point is measured, such as the center of the artwork, its bottom edge or the top of a patch. Use the finished cap seam or another agreed reference so the factory can repeat the location during production.
Flat embroidery, raised embroidery, woven patches and printing each suit different artwork and surfaces. Compare versions on the proposed fabric. Look at the smallest letters, the shape of fine lines, the edge of filled areas and any change in the crown around the decoration. A mockup is useful for placement but cannot show how the finished surface will curve or whether a dense design will distort a soft front panel.
Try the artwork on a wearer and photograph it from the distance customers are likely to see. A front logo can be partially obscured by a strong visor curve when seen from below. A side graphic might move out of sight as the panel curves. Check rear decoration with the closure set across its usable range, especially if it sits close to an opening. Mark any changes on the photo and record the new measurements in the approval file.
If several fabrics share one logo, check the artwork on each background color. Contrast, thread color and edge finish can change how a design reads even when the same file is used. Ask what setup charges apply by size, method and placement. The M&A Sourcing embroidery and printing guide provides related questions to bring to a supplier. Keep an approved decoration example from each materially different combination so receiving staff have a physical reference.

Build a tech pack suppliers can quote accurately
Give every style its own code and a dated drawing. Include front, side, back and interior views where a detail matters. Name the crown and visor dimensions, specify the agreed closure and show the location of all logos. List the shell, lining, sweatband, panel support, seam tape, thread and hardware. Identify which parts require a color match and which are supplied in a standard finish.
For measurements, specify the points and the condition of the cap. A soft cap and a structured cap may be measured differently if one collapses when laid flat. Use the same method for the buyer, factory and receiving team. Include a drawing or a photograph with measurement arrows. State tolerances for the dimensions that affect fit and appearance. If a measurement has no agreed tolerance yet, identify it as open before production.
Set up the variant schedule by style, color, size, closure and artwork. If two styles share most materials, list which components are common and where they differ. For a cap with team-specific logos, assign separate codes even when the cap body is identical. This makes it easier to reconcile sample approvals, packing labels and purchase orders. The workwear tech pack checklist offers a structure that can be adapted to headwear.
Keep revisions visible. When a fitting changes the crown depth or the buyer moves the logo, update the drawing and affected measurements in the same file revision. Send a short change note that identifies what the factory should recheck. Archive the old reference with its date and mark the new one as current. A supplier comparing an old email attachment with a new purchase order should be able to tell which details control.
Review a prototype and a production reference
Use the first prototype to make decisions about shape, fit and construction. Ask the supplier to label any temporary materials so the fitting team can distinguish which observations are final. A prototype with substitute fabric may still help confirm visor length, but the approved feel and decoration should come from the intended materials. Use a separate sample for decisions that cannot be made reliably on the prototype.
Make the sample review repeatable. Have the wearers try the same motions and take front, side and rear photos under comparable conditions. Record each sample code and the closure setting. If a crown sits too high, show where it lands on the wearer and state the desired change. A request to make the cap smaller may otherwise lead to a reduced circumference when the actual issue is crown depth.
Check the planned care method on the complete cap when cleaning is part of the program. Document the method and inspect fit, visor shape, surface appearance, color and decoration before and after. Compare the result with an unwashed reference. If a customer contract requires specific tests or acceptance values, put those requirements into the order documents and clarify how results will be reviewed.
Approve a production reference with the intended material, trims, color, construction and artwork. Have the buyer and supplier retain matching references or an agreed record with detailed images. If an exception is approved for a specific lot, record its scope and what should happen on the next order. Use the sample approval guide to structure feedback and link the approved sample to the latest specification.
| Stage | Decision | Record to retain |
|---|---|---|
| Prototype | Profile and panel construction | Annotated side and front views, sample code and revision |
| Fit trial | Circumference range, crown depth and closure | Measurement method, wearer feedback and closure settings |
| Branding | Decoration method, position and colors | Approved artwork file and decorated production material |
| Production sample | Fabric, trims and finished construction | Signed sample and current tech pack |
| Packing and receiving | Carton method, quantity and variant codes | Packing reference, approved labels and inspection record |
Compare quotations, minimums and delivery dates
Give each supplier the same variant schedule and ask for a written quote against the same technical revision. Separate cap price, artwork setup, sample charges, packing and applicable transport. Confirm which currency and delivery terms apply to each offer. If one supplier proposes a stock body and another proposes custom panel construction, record those assumptions before comparing unit prices.
Ask where minimum quantities apply. A total order may meet the sewing minimum while a custom-dyed color, closure or branded patch has a separate threshold. For multiple teams or shops, check whether artwork variants can share a material run and whether they require different setup charges. If quantities are uncertain, ask for tiered quotes based on realistic options. The MOQ guide covers similar questions for bulk apparel orders.
Plan the schedule from the delivery date backward. Leave time for artwork sampling, a fit check, any revision, production, inspection and transport. Ask when the supplier’s quoted lead time starts and whether some approvals can occur in parallel. If a launch depends on a new color or custom closure, identify when that component must be available to protect the schedule. Confirm who reports a delay and how it affects the date other teams are using.
Evaluate the cost of receiving a usable order. A lower unit price might involve larger minimums or packing that takes more effort to sort by branch. Include charges that affect the decision and keep assumptions visible. If one option is selected for price and another for delivery, record which parts of the specification the team would accept changing. This makes a fallback easier to review if an approved material becomes unavailable before production.
Run a pilot before splitting stock across locations
For a large program, use a pilot to learn what happens between delivery and first wear. Pick a location that represents the expected use and include people who manage inventory, issue uniforms or handle customer exchanges. Give them the same labels and records the wider program will use. Ask them to check whether a new staff member can identify the correct style and color without relying on someone who worked on the original order.
Keep a record of where each pilot unit goes. If a cap is exchanged, record the reason, the replacement variant and the setting the wearer used. For a retail launch, compare the online description with what customers say when they try the cap. Terms such as shallow crown or adjustable fit can be interpreted differently. A side photograph and an approved measurement range can communicate the fit more precisely. Share the revised product description with anyone preparing shop signs or listings.
Include the stockroom in the pilot review. Check how long it takes to open the carton, count the variants and put them in the assigned locations. If individual units have similar tags, look for a readable color or style code. A small label change can reduce confusion when two cap designs share one brand and differ mainly in the closure or panel shape. Check that any revised labeling is reflected in the carton schedule and the order documents.
When the pilot ends, decide which observations need a product revision, which need an inventory change and which can be solved with clearer instructions. Tie each change to a dated reference. If the next order contains the same shape with different embroidery, preserve the original fit record and approve the new artwork separately. This keeps the next review focused on the decisions that changed while maintaining a history of the features that worked in the field.
Set packing rules before bulk production
Decide how the caps should be presented when unpacked. A structured cap may need support or a packing arrangement that protects the crown. Review how the visor, buckle, patch or embroidered area touches neighboring caps. Check whether a label, tag or fastening can leave an impression during transport. Approve the packing method on a small sample carton if the shape or decoration is sensitive to pressure.
List carton markings and variant codes on the packing specification. Include style, color, artwork version, size when applicable, quantity and destination. Agree how mixed cartons will be identified and which packing list accompanies the shipment. If different branches need separate deliveries, clarify whether the supplier will sort by location or whether that happens at the receiving warehouse. The packing checklist can help align the order and receiving documents.
Plan inspection before the shipment arrives. Decide who checks counts, color, artwork and selected construction details. Use the approved production reference and current measurement sheet. If a discrepancy is found, photograph the affected pieces with the carton label and style code. Keep the affected cartons separate while the buyer and supplier confirm the extent and agree on a response.
For branded merchandise, review the presentation from the customer’s perspective. Confirm the position of retail tags, barcodes and any protective materials that the customer must remove. Test whether barcode labels can be read when caps are packed as planned. Make sure that color names and size codes on the retail packaging match the online listings. These details are easier to correct on a test carton than after products have been distributed.
Use sales and wear feedback to guide reorders
Store the technical file, artwork, color approvals, quotation and packing list with the signed reference. Keep a dated copy for each order if a supplier changes a fabric or the buyer approves a revised placement. A restock decision should begin with the approved code and specification so the supplier can identify what it needs to reproduce.
Record feedback by style and color. If customers frequently return a cap as too shallow, review whether the issue affects the whole profile or a single size. If closures fail at one location, check how staff adjust and clean them before deciding whether the specification needs to change. For a visual concern such as a distorted patch, compare the delivered caps with the reference and note when the difference first appears.
When the supplier proposes a substitute, ask which approvals it affects. A new thread could change the appearance of embroidery, while a different sweatband could alter fit and comfort. Decide what to resample based on the change and use the same review steps as the original approval. Record whether a new order can mix old and new stock or whether the variants need different codes.
Use replacement demand to improve the size or color schedule. Compare sales and issues with the original allocation before deciding which variant performed better. A color can sell out early because it had fewer units at launch. Look at stock records and customer requests together. If a style is repeated for a uniform program, include updated staffing requirements and keep the approved reference available to whoever places the next order.
Apply the process to a two-color custom hat launch
Consider a brand buying two colors of the same cap. It wants a small front logo, an adjustable closure and a crown that keeps its shape on a retail display. The buyer sends the factory a photo of the intended profile, a measurement drawing and two color references. It asks for the same closure in both colors and requests separate pricing for flat embroidery and a woven patch.
During the first review, the embroidered logo looks clear on the light fabric and loses detail on the darker background. The buyer keeps the same artwork shape but evaluates a different thread color for the dark cap. The sample team also finds that the visor curve changes the way the cap sits when stacked. It photographs an approved curve and reviews a small carton to see whether it stays consistent after packing.
At the quotation stage, the dark color has a separate material minimum. The buyer compares launching both colors together, beginning with the light color or increasing the dark run. It calculates how many finished units it can use in each case and checks the delivery dates before committing. It marks the chosen variant codes on the revised order so the sample approvals correspond to the quantity the factory will make.
The team then records the exact color and artwork references for each variant and sends the receiving checklist to its warehouse. If a later batch arrives with a different thread, the warehouse can identify which reference to compare. This example shows how fit, artwork, order minimums and packing affect each other. The most reliable brief connects those decisions to specific documents and samples rather than relying on one general approval.
Send a sourcing brief the supplier can act on
A practical request for quotation includes the intended use, proposed profile, target fit range, shell and trim references, artwork placements and quantities by variant. Attach the sketches and reference images separately. Identify the intended delivery location and date and say whether branded labels or cartons are required. Put the relevant file version in the request so it can be tracked through sampling.
Identify questions the supplier should answer. Ask which details are available in a standard construction and which need new development. Request written confirmation of minimum quantities, sample timelines and applicable setup charges. If two methods are under consideration, ask for a distinct quote and sample plan for each. Give the supplier a single contact for any question that changes cost or production timing.
When assessing offers, read the assumptions and exclusions alongside the price. Check whether samples use the intended materials, whether branding and packing are included and which decisions may change the delivery date. Maintain one comparison table so the team can see where the offers differ. If you revise the brief, send the same revision to all shortlisted suppliers so everyone prices the same requirement.
Use the M&A Sourcing Cap product page to identify the category and the contact page to share your bulk requirement. Include a sample plan that identifies which questions must be answered before production. A supplier who receives the intended use, the actual artwork and the quantity schedule can give a more relevant proposal than one working from a product photograph alone.
Frequently asked questions
What information should I send when ordering custom hats in bulk?
Share the intended use, crown profile, fit range, closure, fabrics, artwork and quantities by color and size. Include a target delivery date and destination. Version the drawings and artwork so the supplier can confirm which files are included in the quote.
Is a five-panel or six-panel cap better for a logo?
It depends on the panel layout and logo. A continuous front may provide an uninterrupted area for the design. If the artwork crosses a seam, approve a decorated sample in the actual material and view it while worn.
How do I measure the fit range of an adjustable cap?
Agree how the inside circumference will be measured at both ends of the usable closure range. Confirm how much closure engagement is required, then fit the sample on wearers near both ends of the range.
Can multiple custom hat colors share one minimum order?
Ask the supplier how minimums apply to the total order and to individual materials, colors, trims and artwork. A shared design can still involve different minimums for a particular material or decoration.
What should I approve before bulk cap production?
Approve fit, crown and visor shape, materials, trim, colors, artwork and packing. Keep a signed reference with the measurement sheet, artwork version and variant schedule. Record and approve any substitution before production.
How should structured caps be packed?
Evaluate a sample carton in the intended packing arrangement. Check where caps touch each other, whether the crown or visor deforms and how tags or closures contact neighboring units. Record the approved method and carton labels.
How can I keep a repeat custom hat order consistent?
Reorder using the approved style and variant codes, physical sample, technical drawings and decoration files. Ask the supplier to disclose proposed changes, then repeat the relevant fit, artwork or packing checks before approving the next run.