
Cargo pants for men are easier to develop when the fit, fabric and pockets are planned as one product. This guide helps clothing brands, importers and retailers build a sample brief, compare production options and prepare a bulk order. Use the silhouette table to shortlist fits and the approval checklist to record the evidence behind each decision.
Start with the role the cargo pant will play in the range
Cargo pants for men can anchor a utility collection, extend a core trouser program or give a seasonal range a different silhouette. Before requesting a sample, decide what the garment should add to the assortment. A retailer that already sells a straight chino might want a relaxed cargo with a distinctly different leg shape. A brand with several wide fits might prefer a straighter cargo that gives shoppers a more structured option. Write the decision in a sentence that describes the wearer, the shape and the reason for adding it.
Define the products the customer will compare on the same rack or page. If the price, fit and fabric are similar to another trouser, the pocket placement and styling need to communicate a visible difference. Take comparative photos on the same model, with the same footwear and layers. Include full-length front, side and back views. A loose knee, a sharp taper or an oversized pocket can look much stronger on the body than in a flat sketch. Use those photos when you brief the supplier so technical decisions support the product the shopper will see.
Estimate how the style will be used across stores or regions. A launch sold online needs a fit description customers can understand before trying it on. A wholesale partner may ask for a clear size assortment, a standard carton and consistent product photography. A core style that needs quick reorders calls for materials the supplier can identify and replenish. These decisions determine what to request from the M&A Sourcing Cargo & Trouser category when discussing sampling, trim options and the production plan.
Choose straight, tapered or relaxed proportions
A straight cargo can give the lower leg a consistent appearance when viewed from the front. A tapered style narrows toward the opening and can emphasize volume around the thigh or knee. A relaxed style usually allows more room in the seat and thigh, with variation in how wide the lower leg remains. Use these labels as merchandising descriptions and confirm the actual dimensions in the fit specification. The labels can mean different things across brands.
Choose a base size and compare the three views while the wearer stands naturally. Check where the waist sits, how the front rise folds and whether the side seam hangs as intended. Compare shape at the knee and hem with normal footwear. For a tapered option, ask the model to dress and remove the trousers without help. The opening needs to work for the intended customer even when the lower leg looks clean in photographs. For a wider option, check whether the hem drags or bunches excessively with the intended length.
If two silhouettes use the same fabric, compare them with equivalent styling. A different shoe, a heavier belt or a tucked shirt can change the apparent proportions. Try the same positions and compare how each silhouette looks with pockets empty and loaded. When a model sits and stands again, observe whether material stays bunched behind the knee or twists around the shin. Write down which result belongs to fit, fabric or styling before asking for a revision.
Plan the size range around the intended silhouette. A pocket may need a separate placement rule at smaller sizes if it takes up too much of the thigh panel. A wide fit may need a different hem grade from a tapered style. Keep the measurement rules with the style in the size chart development guide so future sampling decisions refer to the same points.
| Fit | Typical cut | Sample check |
|---|---|---|
| Straight | A more consistent lower leg from knee to hem | Check how the leg hangs over the intended shoe. |
| Tapered | The opening narrows toward the ankle | Check entry, seated movement and how the fabric returns after standing. |
| Relaxed | More room around the seat or thigh, with leg width defined in the brief | Check side volume and how a loaded cargo pocket affects drape. |
Build a pocket plan that supports the design
Decide what each pocket is expected to hold and how frequently a wearer will use it. A phone pocket needs an opening and depth that fit the intended device with its case. A large cargo pocket might be designed for occasional use and a particular side profile. Use objects with the right dimensions and approximate weight when trying the sample. A pocket can fit a device on the bench and still be awkward to reach when a person sits down.
Flat patch pockets give a different side view from pockets with a pleat or bellows. A pleat can create more room but may add volume when empty and bulk at the sewing line. A flap can change how easily objects can be reached and may affect the silhouette when it is open. Specify whether the closure is decorative or functional. When the pocket must close over a device, ask the supplier to prove the closure reaches its intended position under load.
Identify openings, corners and attachment points that need reinforcement. Press and move the sample while the pocket is loaded, then compare it with an empty sample. Check whether the side seam pulls and whether a flap edge or closure becomes prominent against the leg. Reinforcement should work with the chosen material and appear where the buyer approved it. Review the inside surface to catch rough stitching or bulky folded edges that are difficult to assess from a photo.
Measure cargo pocket position from a repeatable reference point and identify whether the number refers to the opening, corner or center. For asymmetrical designs, use separate left and right drawings. If the buyer decides to move a pocket after fit approval, verify the effect on leg shape, access and the position of any branding. Put the approved pocket construction and measurement rules in the tech pack.
Compare twill, ripstop and stretch options
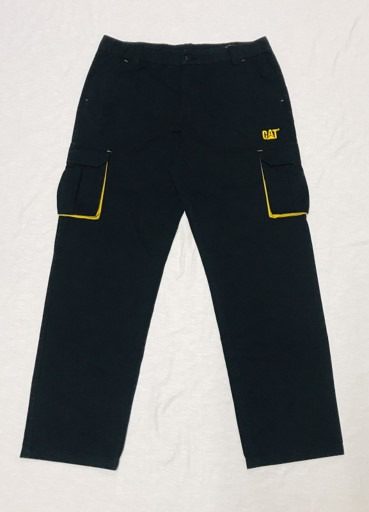
Ask for labeled swatches and construction information rather than choosing from a fabric name alone. Twill can provide a clearly defined diagonal surface. Ripstop has a reinforcement grid in its structure. Stretch options can change the way the garment moves, feels and returns after use. Confirm the proposed fiber content, fabric weight, finish, color and stretch direction when relevant. Those details help the buyer compare offers from different suppliers.
Review the intended fabric in a complete sample. A swatch can feel flexible off the body while the finished garment feels stiffer at a folded waistband or cargo pocket. Compare the fabric at the knee, seat and inside seams where the wearer bends and sits. If the design depends on a structured leg, check how the cloth hangs after the wearer has sat for several minutes. If the style is meant to feel softer, check whether the loaded pockets collapse or sag more than intended.
Consider whether the finish will be applied to fabric or to completed garments. A finished appearance needs its own reference, particularly if the buyer wants a washed effect. Ask which shade and measurements are expected after finishing. Put the approved physical swatch and garment together so an inspector knows where to look and what comparison to make. A commercial photo can help communication, but lighting and display can alter the way a shade appears.
Discuss what happens if the approved fabric is unavailable for the next run. A substitute with a similar weight can differ in recovery, surface and drape. Require a labeled comparison and repeat the affected fit or finish checks before approving it. In the fabric selection guide, buyers can find related questions on material records and sampling before committing to bulk fabric.
Translate the fit into measurements a factory can repeat
Prepare a drawing for the main points of measurement. Waist, hip, front and back rise, thigh, knee, inseam and leg opening are useful starting points. Define how the waistband is measured and whether it is relaxed, extended or fastened. Identify where thigh and knee measurements are taken relative to the crotch or another stable point. If different suppliers measure at different locations, apparent differences can arise even when the garments are similar.
Fit over the layer and footwear the product was designed for. Try standing, sitting and stepping up. Observe whether the waistband gapes, the rise pulls, the knee feels restricted or the side seam changes position. Photograph the symptom while it is happening and note the exact size sampled. Ask the technical team to identify where the pattern needs to change before requesting a general increase in width. A larger leg opening will rarely address a restriction that starts at the knee or seat.
Check a smaller and larger size where proportions matter. An approved base-size sample tells the team how one size works. A sample at the end of the range can reveal grading problems that otherwise show up as repeated size exchanges. Compare the effect of the pocket on the front and side views and confirm the flap can still be reached. Where a pocket dimension stays the same across sizes, record that decision in the grading table.
Set a tolerance by measurement point and agree how it will be checked. A small difference in an opening can prevent a device from fitting, while the same variation at another seam might not affect use. Keep the sample, garment measurements and customer-facing size guide linked to the same revision. The buyer can then see whether a returned pair falls outside the approved specification or whether the size guidance needs clearer wording.
Decide how the waistband, fly and hem will work
The waist construction affects fit and appearance as much as any single measurement. Compare a fixed waistband, a partly elastic option and an adjustable construction if the retail plan calls for a range of fit experiences. Try the waistband with the intended belt if loops are included. Sit for several minutes and check whether the fastener or a thick seam presses against the body. Have the wearer adjust the garment and repeat the movement.
Operate the fly and any snaps or buttons while the sample is worn. Observe whether the front sits flat and whether the parts align under ordinary tension. Inspect the reverse side where the wearer contacts the material. Give the supplier the intended fastener material, color, shape and reference. If the fastener supplier changes, request a finished sample when a new part could change fit or appearance. Record how replacements are approved so a small trim substitution does not appear in bulk without review.
A plain hem, fixed cuff and adjustable opening communicate different shapes. Try each with the footwear expected in product photography and everyday use. If the hem adjusts, check the range in which it remains comfortable and whether the adjustment sits flush. Walk and sit in the sample with the hem in each intended position. Make sure the retail description explains any adjustment the wearer needs to make.
For a program with more than one inseam, make the length part of the variant code. Ask the supplier to include it on garment and carton labels where the buyer needs it. Keep the size and inseam breakdown in the purchase order and make it available to the receiving team. A simple carton schedule can prevent two pairs with the same waist size but different lengths from being issued under the same item code.
Approve color, finishing and decoration together
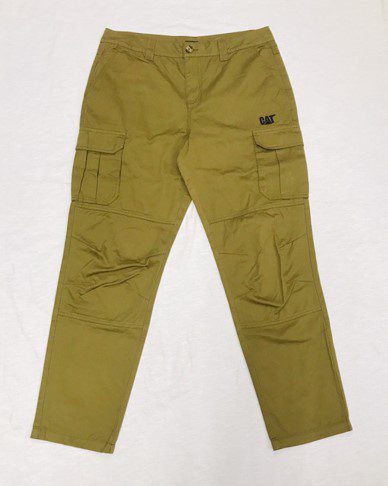
Set a visual reference for each color and record where it applies. The shell, pocket lining, thread, zipper tape, labels and buttons can appear different even when they use the same color name. View the finished sample in the lighting used for approval and in the setting where it is likely to be sold. If an intended contrast appears only on a turned cuff or open flap, include that view in the record.
For garment-washed styles, decide how variation should be judged. Compare the areas that naturally show differences, including seam edges, pocket folds and the lower leg. Ask the supplier to provide representative finished samples or a range of approved shade references when variation is part of the design. Note the garment measurements after finishing. If the approved color changes with a revised finish, have the buyer approve both appearance and fit again.
When adding a woven label, print or embroidery, specify its size, artwork revision and reference point. Check the sample on a wearer with the pocket loaded and the waistband fastened. Decoration near a pocket may alter the shape of an opening, and a label on the waistband can become more noticeable with a belt. Compare images with a physical reference and confirm the approved look before the factory prices or produces variant-specific artwork.
Plan reorders even if the first style is seasonal. Record shell and trim combinations, finish process references and the acceptable shade range. When a new dye or wash lot differs from the first delivery, have the relevant team compare the samples together. Decide whether those lots can be mixed in stock or whether the changed appearance needs a distinct code. Keeping this record makes it easier to answer customer questions and maintain consistent product photography.
Run a wear and laundering trial before production
Write down the intended care process before the trial. Identify the wash settings, drying method, number of cycles and the condition in which the garments will be measured. Use the same measuring procedure before and after laundering. Keep an untreated sample for side-by-side comparison. A repeatable process is especially useful when the buyer and supplier review samples from different locations.
Inspect the waist, rise, inseam, knee and leg opening at a minimum where they affect the fit. Compare fabric appearance at seams and around folded pocket layers. Operate zippers, buttons and adjusters after care, and check whether the markings remain readable. If a part moves outside the agreed requirement, record the original and final measurements with photos and the sample code. Avoid requesting a broad pattern change before the technical team understands the result.
Repeat the original movement trial after laundering. Have the wearer sit, step up and use the same pocket contents. A dimensional change that looks small on a chart can be noticeable when it affects several points at once. Ask the wearer to identify what changed and record the action that exposes it. Retain the original and washed photographs under comparable conditions so the review does not depend on memory.
Make separate checks when a different material, dye or finish could change the outcome. If the purchase calls for formal tests, document the test method and acceptance criteria along with the practical care trial. The sample approval guide provides a structure for organizing the original specification, observations and signed production reference. Give any revised sample a new code so the old trial cannot be mistaken for the final approval.
| Check | How to review | Record to retain |
|---|---|---|
| Garment fit | Measure agreed points and conduct a movement trial | Fit notes, measurement sheet and sample photos |
| Pocket function | Check empty, loaded, standing and seated | Approved pocket drawing and reference items |
| Care results | Repeat measurements and finish checks after agreed laundering | Before-and-after records tied to sample code |
| Production release | Confirm final material, labels, finish and packaging | Signed garment, technical revision and variant schedule |
Quote by variant and calculate what the assortment needs
Prepare a quantity table by silhouette, waist size, inseam, color and decoration. Give suppliers the same revision, the target delivery destination and the form of packing required. Ask each to identify what the price includes and where a separate activity or component has its own charge. If one supplier proposes stock fabric and another proposes a custom dye run, keep those offers distinct when comparing cost.
Ask where minimum order quantities apply. A fabric run can have a different minimum from sewing, labels or particular colors. If two silhouettes use the same fabric, ask whether their quantities can be combined for material buying while remaining separate for pattern and packing. When the size mix is provisional, ask where changes will affect the quote or lead time. The bulk order MOQ guide covers related checks.
Compare the quoted unit cost against the number of pairs the business expects to use. A larger run may offer a lower price but create unwanted sizes or colors. A split delivery can support a phased rollout but may require additional packing or transport. Build a clear comparison that records which costs are current facts and which depend on estimated sales. Keep the estimated date for confirming quantities next to the last date the supplier can accept changes.
Work backward from the date the items need to be available in store or online. Include the time for fitting, fabric and artwork approval, wear trials, confirmation of quantities, production, inspection and transport. Ask when the quoted lead time starts and which inputs must be approved first. Put those milestones in writing so the supplier can raise a delay while the buyer still has time to adjust the release schedule.
Prepare product listings and size information before delivery
Write the fit description after reviewing the approved samples. Say where the garment sits and where it has more or less room. Describe whether the leg remains straight through the hem or tapers from the knee. Use the actual fit code when several styles are similar. Photograph full-length views on a model and include pocket detail shots so buyers can see scale before ordering.
Distinguish body measurements from garment measurements on the size page. If the retailer gives waist width measured across a flat garment, identify it clearly. If the page recommends a size based on the wearer’s body measurement, explain how the buyer should measure. Review the figures against the approved production reference and the length variants in the purchase order. Inconsistent labels can create returns even when the product was made to specification.
Explain pocket function in the language a shopper will use. Include whether a cargo pocket closes or whether the opening is primarily a styling feature. Avoid sweeping claims about what any device will fit. If you mention a specific device range, confirm it with the actual sample before updating the description. Show the closure and the size of the opening in a close-up if the feature is central to the style.
Match product titles, color names and variant codes across the listing, hangtag, carton and order schedule. When two washed finishes are deliberately different, give each its own description and product photography. Ask receiving staff to compare labels and artwork with the approved references before stock is made available for sale. Resolving the mapping before delivery reduces the chance that a dark shade, long inseam or alternate fit is sold under the wrong listing.
Plan inspection and reorders using the same reference files
Prepare the receiving record with the signed sample, approved measurements, shade references and variant list. Confirm where carton labels show waist, color, inseam and quantity. If cartons mix sizes, ask for their individual breakdown. The warehouse should be able to match cartons against the purchase order without guessing what a short style code means.
During receiving, use the agreed inspection plan to check counts, labels, colors, measurements and construction. Test pockets and fastenings where they affect the buyer’s brief. Document discrepancies before combining lots. Provide a photo with a carton reference and a measurement point wherever that helps identify the affected stock. Keep the inspection outcome and supplier response together if a replacement or adjustment is agreed.
Track customer returns and exchanges by reason. An inseam complaint can reflect the garment’s true length, a mismatched label or size guidance that was unclear. A cargo pocket complaint can result from access, capacity or an unexpected silhouette when empty. Compare the feedback with the original sample and receiving results. Keep separate records for the affected size or shipment so purchasing can decide what needs a new test.
For a repeat order, send the last approved technical revision together with any explicitly agreed changes. Preserve a physical reference or a well-documented equivalent. Ask the supplier to identify material and trim substitutions before quoting. Review the issue that prompted a change with the same measurement or wear test that revealed it originally. This gives both sides a practical basis for approving the revision and helps the new batch support the same product listing where appropriate.
Worked example for a two-fit launch
A retailer plans one straight and one tapered cargo pant in the same dark olive fabric. The straight fit will carry a larger pocket as a visible design feature. The tapered fit will use a smaller pocket and cleaner side profile. The buyer wants to compare the product looks before committing to both options, so it requests two patterns in the same fabric with similar hardware and styling. Both samples are photographed on the same model and used in the same fitting sequence.
The samples reveal that the tapered garment feels comfortable through the knee but its opening is difficult to pull over the shoe the stylist is using. The buyer confirms that the product is expected to be dressed without shoes and repeats that check. It widens the opening slightly after seeing how the intended customer would use the pants, then rechecks the appearance from the front and side. The straight version remains approved with its original lower leg dimensions.
The team also finds that the straight style’s pocket bellows pulls away noticeably when empty. It asks the supplier to trial a different fold construction at the same approved opening and location. The next sample is tried both empty and with a phone. The pocket detail photos and measurement drawing are updated so the product page describes the production design. The supplier confirms whether the revised construction affects price or timing before the buyer approves bulk sewing.
At the order stage the buyer groups the two styles for fabric sourcing and keeps separate quantity and labeling schedules. Receiving checks the carton code and stated inseam against each style. After launch, exchanges for a longer length are tracked by fit. The buyer can adjust the next allocation and check whether the size page needs clarification. If a garment change is required, the prior measurements and feedback provide a defined starting point for the next fitting.
Create a clear request for quotation and sample order
Begin the request with a short product description, intended sales channels and the initial delivery date. Include a fit reference, technical sketch, fabric goals, silhouette and full pocket plan. Give every proposed style a distinct code. Reference photographs can support the brief when they are marked to show the dimensions, shapes or views that the buyer approves. Note the expected difference between the supplied reference and the intended new garment.
Give the supplier a size, color and length schedule with provisional figures labeled. Ask for the proposed material reference, order minimums, sample cost, timing and quotations per style. Describe any transport and packaging needs that affect the quote. Have the supplier list assumptions where the brief is still open. If a price depends on a stock fabric or a standard color, record it alongside the option that matches the intended retail range.
Set what the first sample should answer. A fit round might settle proportions and pocket access on substitute material. A later sample should confirm production fabric, shade, decoration and behavior after laundering. Approve the final specification against a signed garment before bulk release. Record any last-minute change with the revision, impacted styles and a decision owner. This keeps merchandising, sourcing and receiving teams working from the same product definition.
Share your brief through the M&A Sourcing contact page and refer to the Cargo & Trouser product page when discussing your product category. If the requirement is an employee uniform rather than a retail assortment, the cargo work trousers guide covers job-specific fit and buying decisions. For the retail order, bring the intended wearer, product listing and reorder plan into the same conversation so the first sample answers the questions that matter to the sale.
Frequently asked questions
What is the difference between straight and tapered cargo pants for men?
A straight style keeps a more consistent lower-leg shape, while a tapered style narrows toward the hem. Compare the actual knee and opening measurements and try both samples with the footwear used for the product range.
Which fabric should I sample for a men’s cargo pant collection?
Compare finished samples made in the proposed fabrics. Review appearance, drape, pocket behavior, mobility and the expected care process. Confirm the approved material, finish, weight and shade reference in the buying file.
How should I check the capacity of a cargo pocket?
Test the actual objects or size-equivalent samples. Have wearers reach the pocket while standing and seated, and inspect the garment with the pocket both loaded and empty. Specify the approved opening and placement in the tech pack.
Which measurements belong in a cargo pants tech pack?
Record waist, hip, rise, thigh, knee, inseam and leg opening as applicable. Draw the measuring points and include pocket dimensions and placement. Specify how garments are measured and which tolerances apply before and after finishing or care.
Can different cargo pant silhouettes share a bulk fabric order?
Ask whether the supplier can group common material requirements. Retain separate style, size and packing schedules. Check whether individual colors, labels, trims or sewing runs still have their own minimums.
What should I confirm before releasing bulk production?
Approve a representative garment with the intended fit, material, color, pockets and trims. Complete the agreed wear and care checks. Keep the signed sample with its technical revision, variant schedule and packing instructions.
How do I reduce size exchanges for online cargo pants orders?
Show the garment fit and inseam clearly. Label whether the chart describes body measurements or garment dimensions. Compare exchange reasons with garment measurements, size labels and the original size allocation before changing the next order.